Thursday, November 2, 2017

Bacon, Lettuce, and Tomato Salad

Red, ripe tomatoes, fresh from the garden.  Yum! One of the nice things about tomato season is Bacon, Lettuce, and Tomato Sandwiches.  Most of the year, we don't buy bacon, but come August....
Since we are trying to reduce the amount of bread we consume and at the same time increase the amount of greens we eat, salad seemed the way to go.

So here's how I make a 

Bacon, Lettuce, Tomato Salad

1 head romaine (or any lettuce that looks delicious), ripped or chopped into bite sized pieces
6 slices bacon, (regular, turkey, or vegetarian equivalent) cooked crisp and crumbled
3 hard boiled eggs, chopped
2 - 3 tomatoes, chopped
1 cucumber, peeled and seeded if necessary, and chopped
1 avocado, diced

Dressing:
2 Tbs mayo, or similar sandwich spread
2 tsp mustard
2 Tbs  milk or non-dairy alternative

Whisk the dressing ingredients together.

Toss the lettuce, tomatoes, cucumber, and avocado with the dressing. Top with the eggs and bacon.


This makes a pretty, delicious main dish salad.

Butternut Casserole

We've had a hard time growing winter squash in the greenhouse.  Between the heat, the squash bugs, the cucumber beetles, and the diseases associated with all of the above, we've never had a good crop until this year. The guineas killed the bugs. But most importantly, we got some extra special seeds from the fantastic folks at the local seed company, Commonwealth.

Butternut Casserole

1 medium butternut squash (2 pounds, more or less)
2 eggs
3 Tbs maple syrup
1/4 c cream (or milk or the milk substitute of your choice)
3/4 tsp cinnamon
1/4 tsp powdered ginger
1/4 tsp salt
nutmeg

Cut the squash in half and scoop out the seeds.  Put the squash, cut side down, on a baking sheet with sides. Bake for 40 minutes (more or less, depending on the size and shape of your squash) at 375 degrees (more or less, depending on if you have something else in the oven at a slightly different temperature) until it feels cooked  when you poke it with a fork. Let cool at room temperature until you can handle it. (I sometimes do this the night before.)

Preheat oven to 350.

Scoop out the squash pulp and mash it with your favorite mashing method. Potato masher, electric mixer, stick blender, food processor.  Any of them work.

Add the rest of the ingredients except the nutmeg, and mix well. 

Pour into a 1 1/2 quart casserole dish and sprinkle with nutmeg. Bake for 45 minutes or until it seems cooked when you wiggle the dish.
It's mildly sweet, and a perfect fall side dish.

Friday, August 11, 2017

Blueberry Zucchini Bread

We sometimes go on vacation with DH's family.  Since he has 7 brothers and sisters, all of whom are married with children, many of whom, but not all of whom come to the lake, it is really hard to estimate how much food to bring and prepare. On the last full day, there were still a couple of zucchini and a half gallon of blueberries in the freezer.

Blueberry Zucchini Bread

1/4 C butter, melted
1/2 C cane sugar
1/2 C brown sugar
1 egg, beaten
1 1/2 C flour (whatever kind you like)
1 tsp baking soda
1 tsp salt
1 1/2 C grated zucchini (lightly packed, not drained)
1 C blueberries, fresh or frozen

  • Preheat the oven to 375 degrees.
  • Mix the butter, sugars, egg, and zucchini in a large bowl.
  • Add the flour, baking soda and salt. Mix just until combined.
  • Fold in the blueberries.
  • Put the batter into a greased 9"x5" loaf pan. Bake at 375 degrees for 55 minutes 
This was what was left of it by the time I found the camera and got back to the kitchen.

Wednesday, May 10, 2017

Broccoli Cheese Strata

I keep trying to grow beautiful broccoli.  Sometimes it works, sometimes it doesn't.  I like using the ugly heads for casseroles. The broccoli is still delicious, and nobody can tell it used to be weird-looking.

Broccoli Cheese Strata

1 Tbs. olive oil
1 medium onion, chopped
3 cups chopped broccoli
1 carrot, grated or julienned
1 garlic, minced
1.5 tsp fresh oregano, or 1 tsp dried
1 tsp fresh thyme, or .5 tsp dried
4 eggs
1 1/2 cups milk
1/2 tsp salt
1/4 tsp pepper
6 slices stale bread, cut into large cubes
1 cup grated mixed Italian cheese
2 Tbs grated Parmesan cheese

Heat the olive oil in a skillet. Add the onion, broccoli, carrots, and garlic, and stir until the onion is soft and the broccoli is fork-tender. Add the oregano and thyme.  Stir until fragrant, then take off the heat and set aside.

In a bowl, beat the eggs.  Add the milk, salt, and pepper and stir until combined.

Spray an 8" square casserole dish with olive oil cooking spray. Arrange half the bread cubes into the casserole, followed by half the vegetables then half the Italian cheeses. Then add another layer of the rest of the bread cubes, followed by the rest of the vegetables, then the rest of the Italian cheeses. Pour the egg mixture over the top.  Sprinkle the Parmesan over the top.  Cover, and let sit for 4 hours or over night.

Bake at 350 degrees for 45-55 minutes, until a knife stuck into the center comes out clean.


Thursday, May 4, 2017

Migraine Smoothie

Yeah, this is only a farm recipe by chance.

This is how my morning went:
11:00 drop off the taxes at the post office
11:13 aura starts
11:14 aura has doubled in size, stomach starts getting queasy. Start making smoothie
11:18 finish making smoothie. aura has doubled in size again. start chugging smoothie.
11:19 finish drinking smoothie
11:22 drink earl grey caffeinated tea
11:36 aura gone! no headache.

Another headache averted.

Here's how the Migraine Smoothie started. We met a man with  When I said I was getting a migraine, a man I knew told me that the research he had seen showed a correlation between low potassium and migraines. He had a PhD in Human Nutrition, so it seemed credible. He offered to make me some potassium pills with some pharmaceutical  potassium that he had. I took the pills and took a nap, and when I woke up the migraine was gone, but my mouth tasted metallic.

When I told our nurse practitioner about this she was very concerned.  Apparently, too much potassium can stop your heart. I'm pretty committed to keeping my heart beating at a steady rate for many years to come, so I decided to NEVER DO THAT AGAIN.The nurse practitioner told me that magnesium is also implicated in migraines, so she recommended that I take magnesium. There's a powdered form you can put in a drink that is useful both for fighting migraines, and relaxing at bedtime.

You can't actually eat enough bananas to cause heart issues. Here's a BBC article on Bananas and Potassium.  The thing about migraines is that you are racing the clock. My goal was to use food as medicine to alleviate the headache as quickly as possible. I wanted potassium, magnesium, and calcium (which I had read was good for headaches, if not specifically for migraines).

A banana has 422 mg of potassium or 12% daily value and 27 mg of magnesium or 7% daily value.
1 Cup of orange juice (with calcium) has 420 mg of potassium, 27 mg of magnesium and 30% DV of calcium. 
1/2 Cup Traditional plain Greek yogurt has 230 mg of potassium, 23 mg of  magnesium (6% DV)  and 35% of the daily value for calcium.
These are the core items that make up the migraine smoothie. Everything else is optional. You don't want to rummage through the pantry looking for flax seeds or run out to the garden to gather strawberries. Fast is good.

Migraine Smoothie

1 C orange juice
1 banana
1/2 C plain yogurt
1/2 C fresh or frozen (the cold may be helpful for the headache, too) berries (optional)
1/2 C leafy greens,  such as spinach, kale, collards, chard, lettuce, sorrel (optional)
1 tsp seeds (sesame or flax, optional)

Put everything in the blender. Do not stop to measure. Just dump it in.  The exact ratio doesn't matter. This is more a nutrient delivery system than a culinary masterpiece (although it is quite tasty). Turn the blender on as high as it can go. Blend on high for at least 30 seconds.


Wednesday, April 12, 2017

How to dry herbs

Your CSA share came, and you've got more herbs than you can use this week.  Or the parsley in the garden is out of control, and about to bolt.  What's a person to do?

Dry them!  Herbs that you dry yourself are so much better than what you get in the store.  You can tell just by comparing the colors.

Here are 3 ways to dry herbs.  Each has its advantages and disadvantages.

Dried Herbs Setup

For all methods of drying herbs, you have to start with clean, dry-ish herbs.
Wash your herbs and dry them.  To dry them you can
  • pat dry with a towel
  • shake them off
  • let them go for a ride in the salad spinner

Dried Herbs in the Oven

Turn on your oven to the lowest setting.  I use 175 degrees.  Put a paper towel down on the bottom of a baking sheet that has edges. Put the herbs on the towel in a single layer. 

Put the baking sheet in the oven for 2 hours. Check the herbs.  You want them to feel crispy to the touch. If they aren't quite done, give them some more time.

Dried Herbs in the Microwave

Put a paper towel on a microwave safe plate. Take the leaves off the stems, and put the leaves on the paper towel.

Microwave on high for a couple of minutes. Check them frequently.  You want them to feel dry to the touch, but if they start to smoke, or if the color starts to turn dark, they will be burnt.

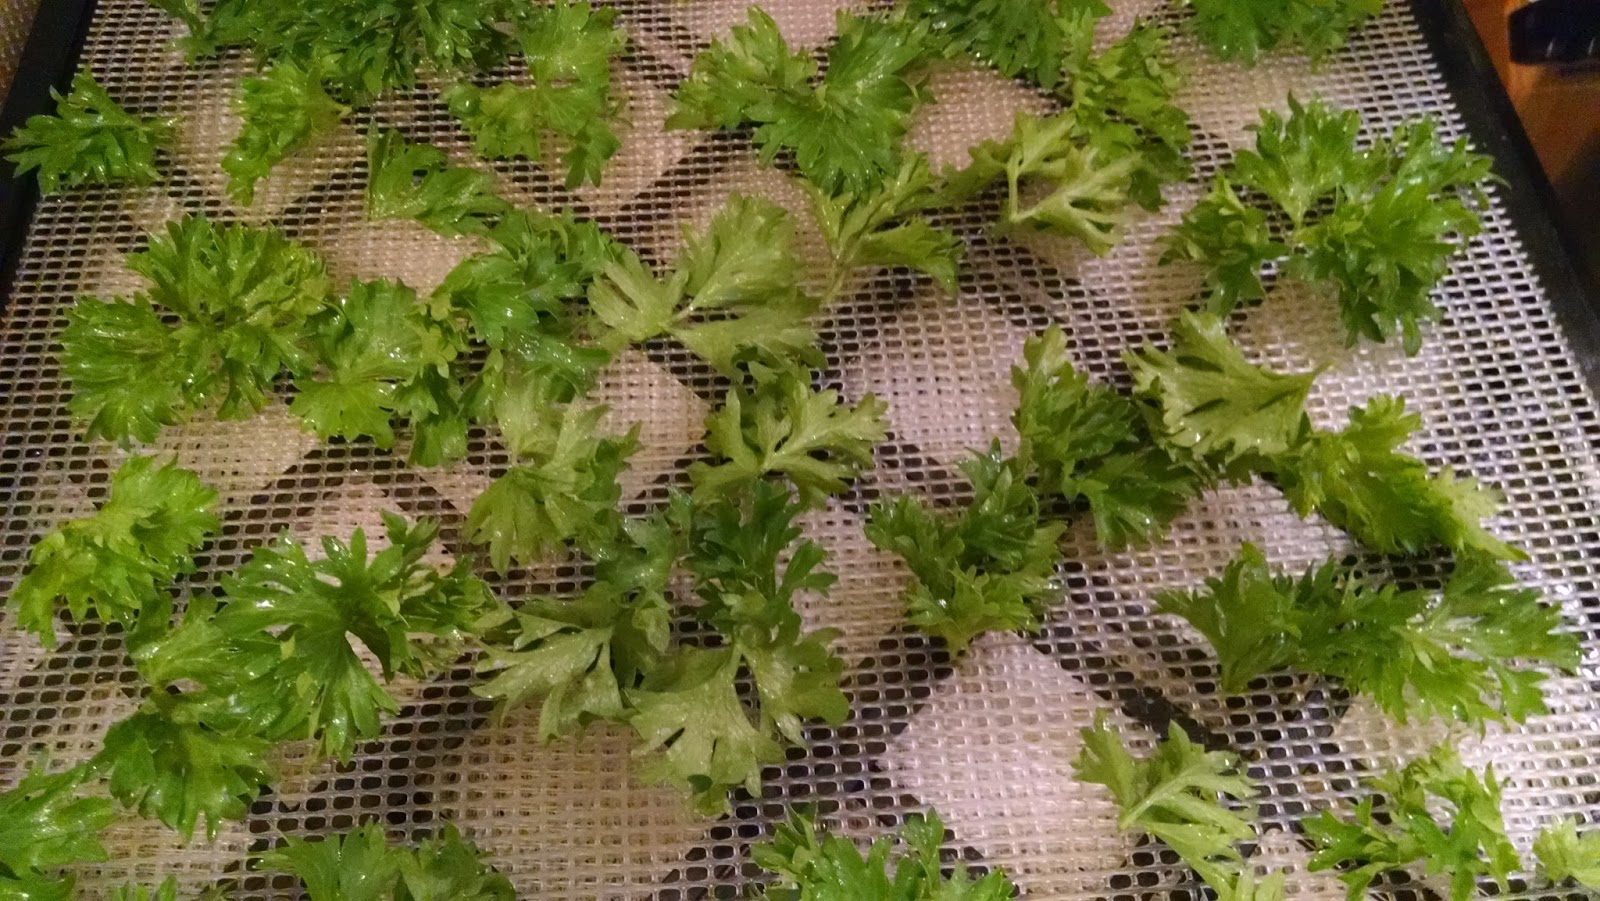
Dried Herbs in the Dehydrator

Take the leaves off the stems, and put the leaves on the screen for your dehydrator. They need to be in a single layer.
Put the trays into your dehydrator.  Use the herb setting, or 95 degrees. They might take 12 - 24 hours. They are done when they feel brittle.

Finishing Up Your Dried Herbs

Let the leaves cool.  This lets them release the last of the moisture. Crush the dried leaves between your hands, or you can store them without crushing them if you would like.

Seal the herbs in an herb bottle or plastic bag. You don't want to let any humidity in at this point.

And you are done! You can add herbs to all sorts of delicious foods all year long.

Comparison of Methods

I like using the oven because it does a lot at once, and you don't need to watch the herbs so carefully to make sure they don't burn. Also, the preparation is quicker, because you don't have to take off the stems. You can just rub the leaves between your hands and take the stems out at this point. The down side is that the oven uses a lot of energy and heats up the house.

I like to use the microwave when I only have a small amount to dry. The microwave seems to preserve the color better, too. The problem with the microwave is that the herbs can go from damp to burnt very quickly. Also, the microwave cannot do very much at a time.

The dehydrator is nice for large amounts. It also has a timer, so you can have it turn off after whatever amount of time you guess is correct. The dehydrator has some disadvantages, in my opinion. The biggest one is the variability of the time. Is it 12 hours or is it 24?  If the dehydrator turns off in the middle of the night, and it is really humid, the herbs can rehydrate, and you have to start again.

Why am I not hanging my herbs up to dry in the kitchen like grandma used to?
  1. If they are hanging up, they are easy to forget.
  2. It is so humid here in the summer, that I am afraid they will mold.
  3. It can be really dusty here,
  4. Bugs.  Flies.  Stinkbugs.  Enough said?  No?  I had to take a stinkbug off of one of my seed trays this morning, so I know they like the fresh greenery.   Yuck.
So dry your herbs and add flavor and nutrition to your meals all year. 

Sunday, March 26, 2017

Egg Salad with Kale

Eggs and kale.  Who knew?  So delicious together.

Basically, just make egg salad however you usually do it, but substitute kale for the celery. It's prettier, tastier, healthier.  You can use as much or as little as you would like.  You can make an egg salad that has just a little bit of kale, or an egg salad that is MOSTLY kale. It's still delicious.

I'm going to write down a recipe, but really, I just wing it.

Egg Salad with Kale

12 hard cooked eggs, chopped
1/2 cup mayo with olive oil
1 Tbs. mustard
2 cups chopped kale (massage it a bit with your fingers to soften it)
1 Tbs. or more vinegar if it looks like it needs it.

Mix all the ingredients together.  You can also throw in any of the following:

minced onion
chopped pickles
chopped olives
grated cheese

Make sandwiches with whole grain bread or pita bread. I like scooping it up on gluten-free crackers.


Monday, March 6, 2017

Endive Frisee Salad with Cranberries, Apples, and Walnuts

I am not a huge fan of bitter food. I mean, why?  Right? But so much of it is so good for you. So when I plant endive, I go for the milder varieties.  And when you feature endive in a salad, a little sweetness adds a lot.

Endive Frisee Salad with Cranberries, Apples, and Walnuts


3 Tbs olive oil
2 tsp white wine vinegar
1/2 tsp honey
1 head endive frisee
1 apple, cut into quarters, cored, and slice thinly crosswise
1/2 cup dried cranberries
1/2 cup walnut pieces

In a small bowl, whisk together olive oil, vinegar, and honey.

Put the walnuts in a dry skillet over medium heat.  Stir frequently, until they start to smell warm and delicious, and turn slightly golden.  (Don't let them burn.)

Tear the endive into bite-sized pieces. Toss with the cranberries and apple slices. Drizzle the olive oil mixture over the top and toss again.  Sprinkle with the walnuts.

So simple, and so delicious.